Introduction
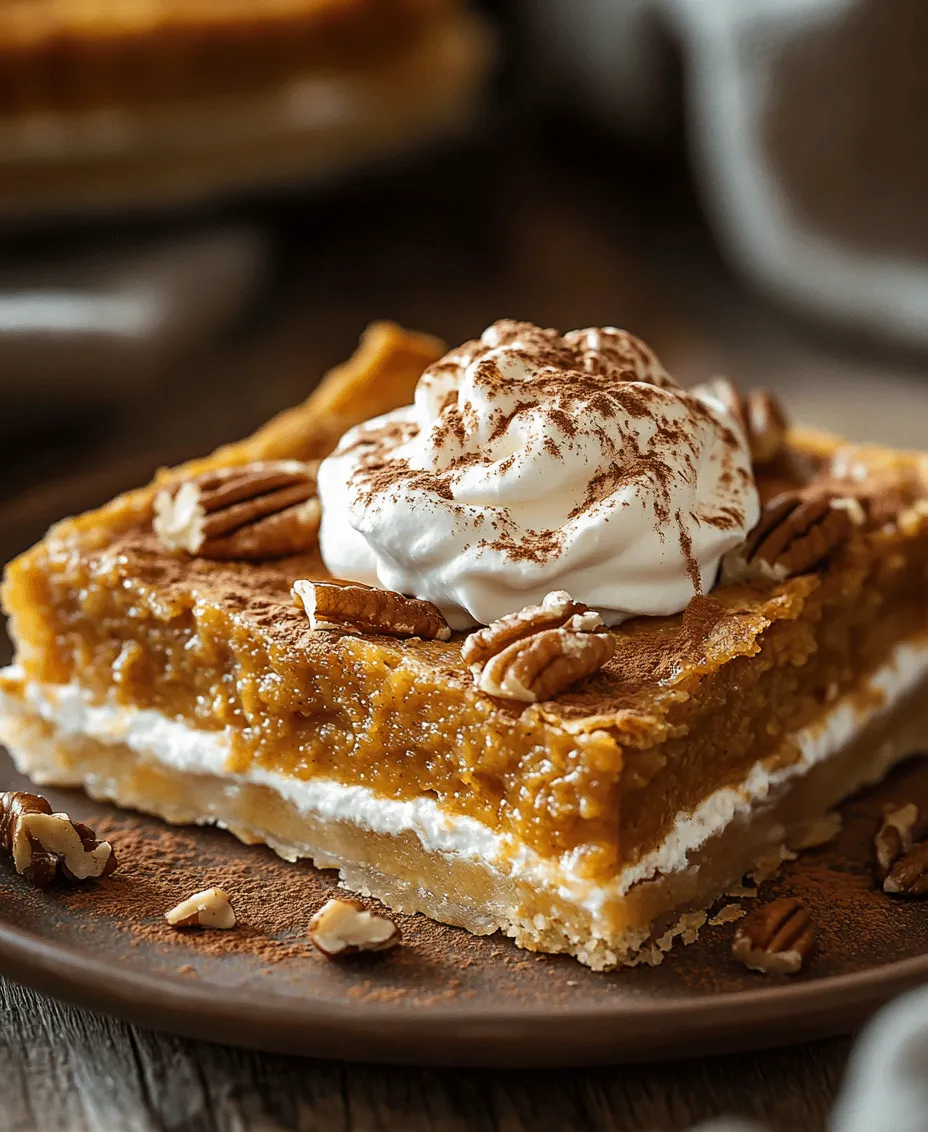
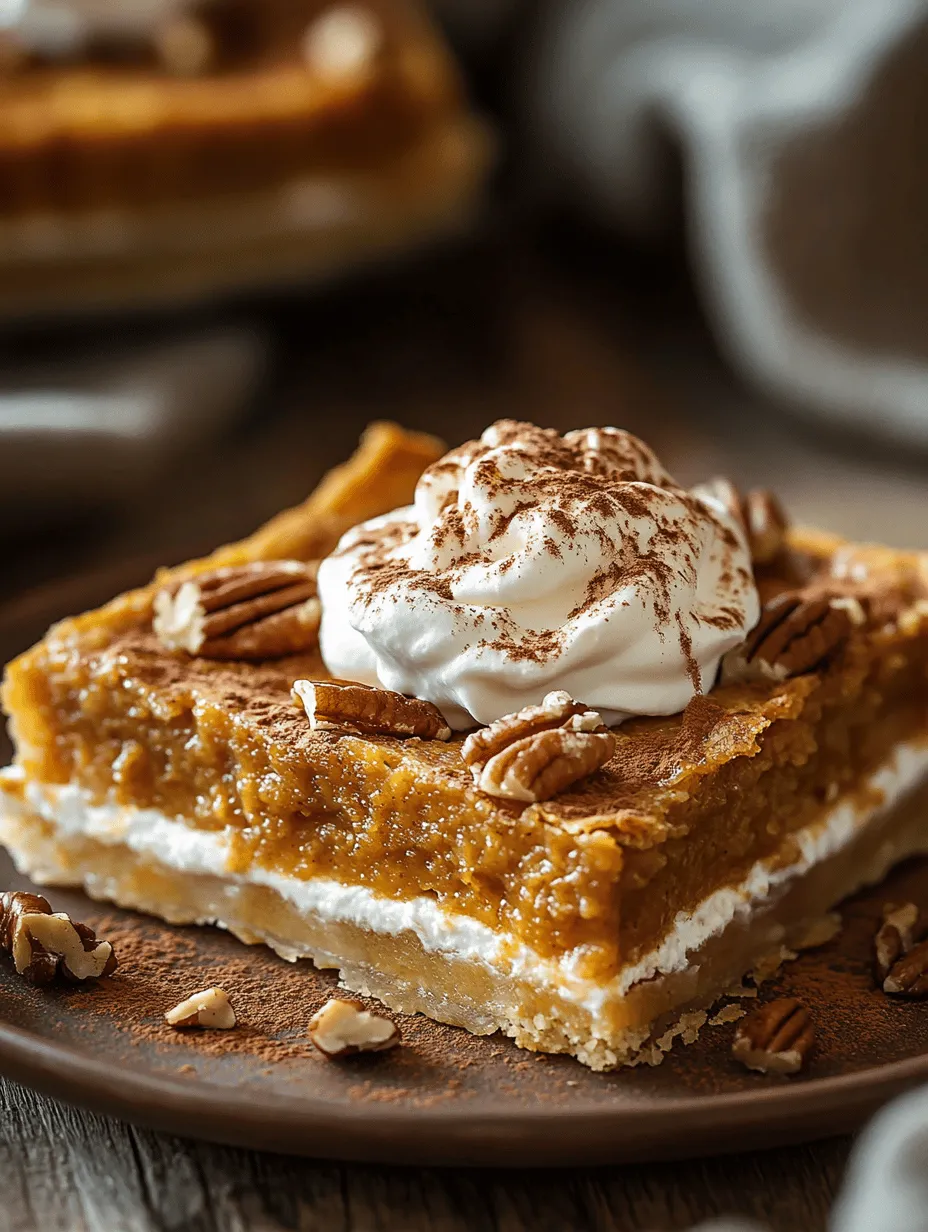
As the leaves begin to turn and the air becomes crisp, the scent of pumpkin pie wafts through kitchens across the country. This beloved dessert has become synonymous with fall, particularly during Thanksgiving and Halloween celebrations. While many are familiar with the traditional round pumpkin pie, there’s a delightful twist that has gained popularity: the pumpkin slab pie. This ingenious variation takes the classic flavors of pumpkin pie and transforms them into a large, easy-to-serve dessert that’s perfect for gatherings of all sizes.
So, what exactly is a slab pie? Unlike its round counterpart, a slab pie is baked in a rectangular or square pan, allowing for more servings and making it easier to slice and serve. This feature is particularly appealing for larger gatherings, where you want to ensure everyone gets a taste of that warm, spiced goodness without the hassle of portioning individual pies. The beauty of a pumpkin slab pie lies not only in its presentation but also in its ability to showcase the rich, creamy filling and flaky crust in a way that’s both inviting and delicious.
To achieve the perfect pumpkin slab pie, using fresh and high-quality ingredients is essential. Whether it’s the pumpkin puree or the spices that bring warmth to the filling, each element plays a crucial role in creating a pie that is bursting with flavor. In this article, we will delve into the ingredients needed, guide you through the preparation process, and offer some serving suggestions that will elevate your pumpkin slab pie experience.
The Allure of Pumpkin Slab Pie
The history of pumpkin pie is deeply rooted in American culture. While the origins of pumpkin as a food source can be traced back to Native American tribes, it wasn’t until the early 19th century that pumpkin pie became a staple in American households. The first published recipe for pumpkin pie appeared in a cookbook in 1796, and since then, it has evolved into a cherished tradition during the fall season.
Pumpkin slab pie embodies this rich history while offering a modern twist that is perfect for today’s busy lifestyles. The versatility of slab pies makes them an ideal choice for gatherings, potlucks, and family celebrations. They can be prepared ahead of time, served warm or cold, and can even be transported easily, making them a perfect option for sharing at events.
What makes pumpkin slab pie particularly appealing is its ability to please a crowd. The generous size allows for more servings, ensuring that everyone can indulge in a slice (or two) of this delightful dessert. The combination of creamy pumpkin filling, fragrant spices, and a buttery crust creates a flavor profile that is universally loved, making it a staple during holidays and family gatherings.
Understanding the Ingredients
To create a truly memorable pumpkin slab pie, it’s essential to understand the ingredients that come together to create its signature flavors and textures.
Crust Ingredients
The crust is the foundation of any pie, and for a pumpkin slab pie, it must be both sturdy and flaky. The following ingredients are typically used:
1. All-Purpose Flour: This is the main ingredient that provides structure to the crust. It’s important to measure the flour accurately to avoid a tough crust.
2. Unsalted Butter: Using cold, unsalted butter is crucial for achieving a flaky texture. The butter should be cut into small cubes and chilled before mixing into the flour.
3. Salt: A pinch of salt enhances the flavor of the crust and balances the sweetness of the filling.
4. Sugar: A small amount of granulated sugar adds a hint of sweetness to the crust, complementing the filling.
5. Ice Water: Adding ice water helps bring the dough together without melting the butter. It’s essential to add just enough to create a cohesive dough.
The key to a flaky crust lies in the butter. Chilling the butter before incorporating it into the flour helps to create layers of fat that produce that desired flakiness when baked.
Filling Ingredients
The filling is where the magic happens, and for pumpkin slab pie, the following ingredients are essential:
1. Pumpkin Puree: The star of the filling, pumpkin puree provides the rich and creamy base. Using fresh roasted pumpkin or high-quality canned pumpkin puree can make a significant difference in flavor.
2. Sugars: A combination of granulated sugar and brown sugar adds sweetness and depth to the filling. Brown sugar contributes a slight caramel flavor that enhances the overall taste.
3. Spices: The spices are what truly elevate the flavor of the pie. A blend of cinnamon, nutmeg, ginger, and cloves creates a warm and inviting flavor profile that is characteristic of fall desserts.
4. Eggs: Eggs act as a binder, giving the filling its desired texture and helping it set during baking.
5. Heavy Cream: Adding heavy cream creates a rich and velvety texture in the filling, making each bite indulgent.
6. Vanilla Extract: A splash of vanilla extract adds an aromatic quality to the filling, enhancing the overall flavor.
The significance of the spices cannot be overstated. They not only add warmth and complexity but also evoke the essence of fall, making pumpkin slab pie a comforting dessert that resonates with tradition.
Optional Garnishes
To take your pumpkin slab pie to the next level, consider adding some optional garnishes. Whipped cream is a classic choice, providing a light and airy contrast to the dense filling. For added texture and visual appeal, consider sprinkling some crushed graham crackers or pecans on top. A drizzle of caramel sauce can also enhance the sweetness and add a touch of decadence. These garnishes not only complement the flavors of the pie but also create an inviting presentation that will impress your guests.
Crafting the Perfect Crust
Now that you understand the key ingredients, let’s dive into the step-by-step process of crafting the perfect crust for your pumpkin slab pie.
Step-by-Step Guide to Making the Crust
1. Prepare the Ingredients: Begin by gathering all your crust ingredients. Make sure your butter is cold, and you have ice water ready.
2. Mix the Dry Ingredients: In a large mixing bowl, combine the all-purpose flour, sugar, and salt. Whisk them together to ensure they are evenly distributed.
3. Cut in the Butter: Add the cold, cubed butter to the flour mixture. Using a pastry cutter or your hands, work the butter into the flour until the mixture resembles coarse crumbs with pea-sized pieces of butter remaining. This step is crucial for achieving the flaky texture.
4. Add Ice Water: Gradually add ice water, one tablespoon at a time, mixing gently with a fork until the dough begins to come together. Be careful not to overmix; you want to retain some of the butter chunks for flakiness.
5. Chill the Dough: Once the dough is formed, shape it into a rectangle or disc, wrap it in plastic wrap, and refrigerate for at least 30 minutes. Chilling the dough allows the gluten to relax and the butter to firm up, which aids in creating a tender crust.
6. Roll Out the Dough: After chilling, remove the dough from the refrigerator and place it on a lightly floured surface. Roll it out into a rectangle that fits your baking pan, leaving some overhang to trim later.
7. Transfer to the Pan: Carefully transfer the rolled-out dough to a greased baking pan. Gently press the dough into the corners and up the sides, ensuring an even thickness throughout.
8. Trim and Crimp: Trim any excess dough hanging over the edges, leaving about half an inch. You can crimp the edges for a decorative touch or leave them plain.
9. Pre-bake the Crust: To prevent a soggy bottom, it’s recommended to pre-bake the crust for about 10-15 minutes at 350°F (175°C) until lightly golden. This step will help the crust maintain its integrity when the filling is added.
With the crust completed, you’re now ready to fill it with that luscious pumpkin mixture and bake it to perfection. In the next sections of this article, we will cover the preparation of the filling and the final steps to create your delicious pumpkin slab pie. Stay tuned for the delightful details that will make this dessert a standout at your next gathering!

Detailed Instructions for Mixing Ingredients and Achieving the Right Consistency
To create a sumptuous pumpkin slab pie, the first step is to mix your ingredients properly. Start with the pie crust. In a large mixing bowl, combine 2 ½ cups of all-purpose flour, 1 teaspoon of salt, and 1 tablespoon of granulated sugar. These dry ingredients provide the foundation for your crust. Next, incorporate 1 cup of unsalted, chilled butter cut into small cubes. Use a pastry cutter or your fingers to blend the butter into the flour mixture until it resembles coarse crumbs. This process is crucial as it helps create a flaky texture.
Once the butter is integrated, add 6 to 8 tablespoons of ice water, one tablespoon at a time, mixing gently with a fork after each addition. The goal is to hydrate the flour without overworking the dough. When the dough starts to come together, stop adding water. You should be able to gently press it into a ball. If the dough feels too dry and crumbles apart, add a little more water.
Importance of Chilling the Dough and Its Effects
Chilling the dough is a pivotal step that should not be overlooked. After forming the dough into a disc, wrap it tightly in plastic wrap and refrigerate it for at least 1 hour. This chilling period allows the gluten in the flour to relax, resulting in a tender crust. Additionally, it helps the butter firm up, which is essential for achieving that desired flaky texture during baking. A cool dough will also be easier to roll out and less likely to shrink while baking.
Tips for Rolling Out Dough and Transferring to the Baking Sheet
When you’re ready to roll out the dough, start by lightly flouring your work surface and rolling pin. Take the chilled dough out of the refrigerator and let it sit at room temperature for about 5-10 minutes to soften slightly. This makes it easier to handle. Roll it out into a rectangle that is about 1/8 inch thick and large enough to fit your baking sheet, leaving some overhang.
To transfer the rolled-out dough to the baking sheet without tearing, use the rolling pin method. Gently wrap the dough around the rolling pin and lift it over the baking sheet. Unroll the dough carefully, pressing it into the corners of the sheet. If any tears occur, simply patch them up with extra dough or by pressing the edges together. Once in place, trim any excess dough and crimp the edges as desired.
Creating the Delicious Filling
Now, let’s prepare the pumpkin filling. In a large mixing bowl, combine 1 can (15 ounces) of pure pumpkin puree, 1 cup of granulated sugar, 2 teaspoons of ground cinnamon, 1 teaspoon of ground ginger, ½ teaspoon of ground nutmeg, ¼ teaspoon of ground cloves, and ½ teaspoon of salt. These spices not only add warmth and depth but also enhance the natural sweetness of the pumpkin.
Next, add 4 large eggs and 1 can (12 ounces) of evaporated milk. It’s crucial to whisk these ingredients thoroughly until the mixture is smooth and homogeneous. This step ensures that the eggs are fully incorporated, which is vital for a consistent texture, and prevents any clumping of the spices or pumpkin.
Each ingredient plays a significant role in the filling. The pumpkin provides a rich, earthy flavor and a beautiful color, while the sugars and spices contribute sweetness and warmth. The eggs act as a binding agent, helping the filling to set, while the evaporated milk adds creaminess and richness to the overall dish.
Assembling and Baking the Slab Pie
Once the filling is ready, it’s time to assemble the pie. Pour the prepared pumpkin filling into the pie crust evenly, smoothing the top with a spatula. To bake the slab pie, preheat your oven to 425°F (220°C). Place the baking sheet on the center rack and bake for 15 minutes. After this initial bake, reduce the oven temperature to 350°F (175°C) and continue baking for an additional 35-45 minutes.
To check for doneness, insert a knife or toothpick into the center of the pie. It should come out clean or with only a few moist crumbs attached. The filling should be set but still slightly jiggly in the center, as it will firm up while cooling. Be careful not to overbake, as this can lead to a dry texture.
Cooling and Serving Your Pumpkin Slab Pie
After baking, allow the pumpkin slab pie to cool at room temperature for at least 2 hours. This cooling period is essential, as it helps the filling to set properly. If you cut into the pie too soon, the filling may ooze out, ruining the beautiful presentation.
For serving, consider dusting the top with powdered sugar for an elegant touch or a dollop of whipped cream for added richness. You can also serve it with a sprinkle of cinnamon or nutmeg for an extra flavor kick.
Pair your pumpkin slab pie with warm beverages like coffee, spiced cider, or even a scoop of vanilla ice cream for a delightful contrast. These additions enhance the overall experience, making each bite even more enjoyable.
Nutritional Information
A slice of pumpkin slab pie offers a comforting balance of flavors and textures, but it also comes with nutritional benefits. One serving typically contains around 250-300 calories, depending on portion size and additional toppings. The primary ingredient, pumpkin, is rich in vitamins A and C, fiber, and antioxidants, making it a nutritious choice during the fall season.
Pumpkin is known for its health benefits, including promoting healthy eyesight due to its high beta-carotene content, supporting immune health, and aiding digestion thanks to its fiber content. When enjoyed in moderation, your pumpkin slab pie can be a delightful addition to a balanced diet.
Conclusion
The joy of making pumpkin slab pie goes beyond just the baking process—it’s about creating cherished memories with family and friends. This recipe is perfect for gatherings, holidays, or simply to enjoy on a cozy evening at home. The aroma of cinnamon and pumpkin wafting through your kitchen will evoke feelings of nostalgia and warmth, inviting everyone to the table.
We encourage you to try this recipe and share it with loved ones, allowing them to experience the comforting and heartwarming sensation of homemade desserts. Whether you’re celebrating a special occasion or simply indulging in a seasonal treat, pumpkin slab pie brings people together and creates lasting memories. Dive into this delightful recipe, and relish every moment of the delicious journey it offers.


