Introduction
Fried chicken is not just a meal; it’s a cherished comfort food that evokes memories of family gatherings, summer picnics, and soul-soothing dinners. This iconic dish has taken many forms across various cultures, but one version that stands out for its unparalleled tenderness and flavor is buttermilk fried chicken. The secret lies in the buttermilk brine, which not only infuses the chicken with a rich, tangy taste but also tenderizes the meat, ensuring each bite is juicy and satisfying.
Originating in Southern cuisine, buttermilk fried chicken has become a staple in American households, celebrated for its crispy exterior and succulent interior. The use of buttermilk as a marinating agent dates back centuries, when cooks discovered that the naturally acidic properties of buttermilk could break down the proteins in chicken, yielding a more tender result. In this guide, we will delve into the origins of buttermilk fried chicken, explore its variations, and teach you how to make the ultimate crispy buttermilk fried chicken right in your own kitchen.
Understanding Buttermilk Fried Chicken
Buttermilk fried chicken holds a special place in the culinary landscape, particularly within Southern cuisine. The practice of frying chicken has deep roots in African American cooking, where it was often associated with special occasions and gatherings. Over the years, it has evolved into a beloved dish that transcends cultural boundaries, enjoyed by people from all walks of life.
At the heart of buttermilk fried chicken is the unique process of marinating chicken in buttermilk before frying. This technique not only enhances the flavor but also plays a critical role in the chicken’s texture. The lactic acid in buttermilk helps to break down tough muscle fibers, resulting in a piece of chicken that is incredibly tender and moist. This marinade is often enhanced with spices and hot sauce, which infuse the meat with flavor from within, ensuring that every mouthful is packed with deliciousness.
While the classic buttermilk fried chicken recipe is revered, variations exist around the globe. In some regions, cooks may add spices like paprika or garlic powder to the buttermilk brine, while others might experiment with different flour blends for the coating. Regardless of the specific ingredients, the core principle remains the same: the combination of buttermilk and frying creates a dish that is both comforting and delightful.
Ingredients for Crispy Buttermilk Fried Chicken
To achieve the perfect crispy buttermilk fried chicken, you will need to gather a few essential ingredients. Each component plays a crucial role in crafting this mouthwatering dish. Below is a detailed list of the ingredients needed, along with insights into their importance:
Chicken Pieces
The star of the dish, chicken pieces can be chosen based on personal preference. Whether you opt for drumsticks, thighs, wings, or a whole cut-up chicken, each piece brings its own flavor and texture. Dark meat, like thighs and drumsticks, tends to stay juicier during the frying process, while white meat, such as breasts, may require a bit more attention to ensure it remains moist.
Buttermilk and Its Benefits
Buttermilk is the key ingredient that sets this fried chicken apart from the rest. Its tangy flavor enhances the chicken while its acidity helps tenderize the meat. Buttermilk is also rich in calcium and probiotics, making it a healthier choice compared to other marinades. When marinated for several hours or overnight, the chicken absorbs the buttermilk, resulting in a luscious, flavorful base that enhances the overall dish.
Hot Sauce for Added Flavor
For those who enjoy a bit of heat, adding hot sauce to the buttermilk brine is a fantastic way to elevate the flavor profile of the chicken. The heat from the sauce complements the creaminess of the buttermilk, creating a delicious balance that keeps you coming back for more. Choose your favorite brand or heat level, but be mindful not to overpower the dish; a few dashes will do the trick.
Seasonings and Spices for the Coating
The coating is where the magic happens, and selecting the right blend of seasonings and spices is essential for achieving that crave-worthy crispy exterior. Common ingredients include flour, salt, black pepper, garlic powder, paprika, and cayenne pepper. These elements work together to create a flavorful crust that contrasts beautifully with the tender chicken beneath. Feel free to adjust the spice levels and experiment with different herbs to make the recipe your own.
Oil Choices for Frying
When it comes to frying chicken, the choice of oil is crucial. You’ll want an oil with a high smoke point that can withstand the high temperatures required for frying. Peanut oil, canola oil, and vegetable oil are popular choices, as they provide a neutral flavor and excellent frying capabilities. Using a thermometer to monitor the oil temperature will ensure your chicken cooks evenly and achieves that coveted crispy texture.
Garnishing Options
While the chicken is undoubtedly the star of the show, thoughtful garnishing can enhance its presentation and flavor. Fresh herbs, such as parsley or thyme, can add a pop of color and freshness when sprinkled over the finished dish. Lemon wedges can also be served on the side for those who enjoy a citrusy kick with their fried chicken.
Preparing the Chicken
Now that you have all your ingredients ready, it’s time to prepare the chicken for frying. The preparation process is straightforward but essential for achieving the best results. Follow these steps to ensure your crispy buttermilk fried chicken turns out perfectly every time:
1. Marinate the Chicken: Begin by placing your chicken pieces in a large mixing bowl or resealable plastic bag. Pour in the buttermilk until the chicken is completely submerged. Add in a few dashes of hot sauce, along with your desired seasonings (such as salt and pepper) to the buttermilk. Seal the bag or cover the bowl and refrigerate for a minimum of four hours, or ideally overnight. This marinating step will allow the flavors to meld and the chicken to tenderize.
2. Prepare the Coating: In a separate bowl, combine the flour with your chosen spices. This will be the dry mixture that gives the chicken its crispy crust. Adjust the spice levels to your liking, but a classic blend typically includes salt, black pepper, paprika, and a pinch of cayenne for heat.
3. Dredge the Chicken: Once the chicken has marinated, remove it from the refrigerator and let it come to room temperature for about 30 minutes. This step helps ensure even cooking. Take each piece of chicken out of the buttermilk, allowing any excess to drip off, and then coat it thoroughly in the flour mixture. Press the flour onto the chicken to create a thick, even coating, which is key to achieving that crispy texture.
4. Prepare for Frying: In a large, heavy-bottomed skillet or Dutch oven, pour in your choice of frying oil, filling the pan to about 1-2 inches deep. Heat the oil over medium-high heat until it reaches a temperature of around 350°F (175°C). Use a thermometer to ensure accuracy, as the right temperature is crucial for frying.
5. Fry the Chicken: Carefully place the coated chicken pieces in the hot oil, making sure not to overcrowd the pan. Fry the chicken in batches if necessary to maintain the oil temperature. Cook each piece for about 12-15 minutes, turning occasionally, until they are golden brown and crispy. Use a meat thermometer to check that the internal temperature of the chicken has reached 165°F (74°C).
6. Drain and Rest: Once the chicken is done frying, transfer it to a plate lined with paper towels to drain any excess oil. Allow the chicken to rest for a few minutes before serving. This resting period is essential as it allows the juices to redistribute, ensuring the chicken remains moist and tender.
By following these initial steps, you are well on your way to creating a flavorful and satisfying dish that is sure to please your family and friends. In the next part of this guide, we will delve deeper into the finishing touches and serving suggestions for your crispy buttermilk fried chicken.

Brining chicken in buttermilk is a crucial step in creating the perfect crispy buttermilk fried chicken. This process not only enhances the flavor but also ensures that the chicken remains moist and juicy when cooked. The acidity in buttermilk helps to tenderize the meat, allowing it to absorb the spices and seasonings you will incorporate later.
Brining Process
To start, place your chicken pieces in a large bowl or a resealable plastic bag. Pour enough buttermilk over the chicken to fully submerge it, typically about 4 cups for a whole chicken. For added flavor, you can infuse the buttermilk with garlic powder, onion powder, paprika, and a generous pinch of salt.
Optimal Brining Times
The duration of brining can significantly affect the final product. For best results, marinate the chicken in buttermilk for a minimum of 4 hours, but ideally, you should let it soak overnight. This extended time allows the buttermilk to penetrate deeply into the meat, resulting in a more flavorful and moist piece of chicken.
Creating the Perfect Coating
Once your chicken has marinated, it’s time to prepare the flour mixture that will create the crispy coating. In a large shallow dish, combine all-purpose flour with a variety of spices to build a robust flavor profile.
Essential Ingredients for the Flour Mixture:
– 2 cups all-purpose flour
– 1 tablespoon paprika (for color and a mild, sweet flavor)
– 1 teaspoon garlic powder (for depth of flavor)
– 1 teaspoon onion powder (adds a subtle sweetness)
– 1 teaspoon cayenne pepper (for a touch of heat)
– 1 teaspoon black pepper
– 1 teaspoon salt
The combination of these spices not only adds flavor but also contributes to the golden hue of the crust. For an even crunchier texture, some cooks recommend adding cornstarch or baking powder to the flour mixture. Aim for a ratio of about 1 cup of flour to 1/4 cup of cornstarch or 1 teaspoon of baking powder.
Frying Techniques for Success
The right equipment plays a vital role in frying chicken properly. A deep skillet or Dutch oven is ideal for frying because it allows for ample space and a controlled environment for the oil.
Heating the Oil
Fill your skillet or Dutch oven with about 2-3 inches of oil, making sure to use an oil with a high smoke point, such as vegetable oil, peanut oil, or canola oil. Heat the oil over medium-high heat until it reaches 350-375°F (175-190°C).
To ensure the oil is hot enough, you can drop a small piece of bread into the oil. If it browns in about 60 seconds, the oil is ready for frying. Maintaining the right temperature is crucial; too low, and the chicken will absorb excess oil and become greasy; too high, and the coating will burn before the chicken cooks through.
Dredging and Frying the Chicken
With your chicken marinated and the oil heated, it’s time to dredge the chicken pieces. Remove each piece from the buttermilk, allowing the excess to drip off before coating it in the seasoned flour mixture. Press the flour mixture onto the chicken to ensure an even coating, shaking off any excess flour.
Preventing Overcrowding
One of the most important tips for frying chicken is to avoid overcrowding the pan. Fry the chicken in batches, ensuring there is enough space between each piece. This will help maintain the oil temperature and promote even cooking, resulting in a perfectly crispy crust.
Cooking Times and Temperature
Cooking times will vary depending on the size of the chicken pieces:
– Chicken breasts: 10-12 minutes
– Thighs and drumsticks: 12-15 minutes
– Wings: 8-10 minutes
Always check for doneness by using an instant-read thermometer; the internal temperature should reach 165°F (75°C). If the chicken is browning too quickly, reduce the heat to avoid burning the crust while the inside cooks through.
Draining and Serving the Chicken
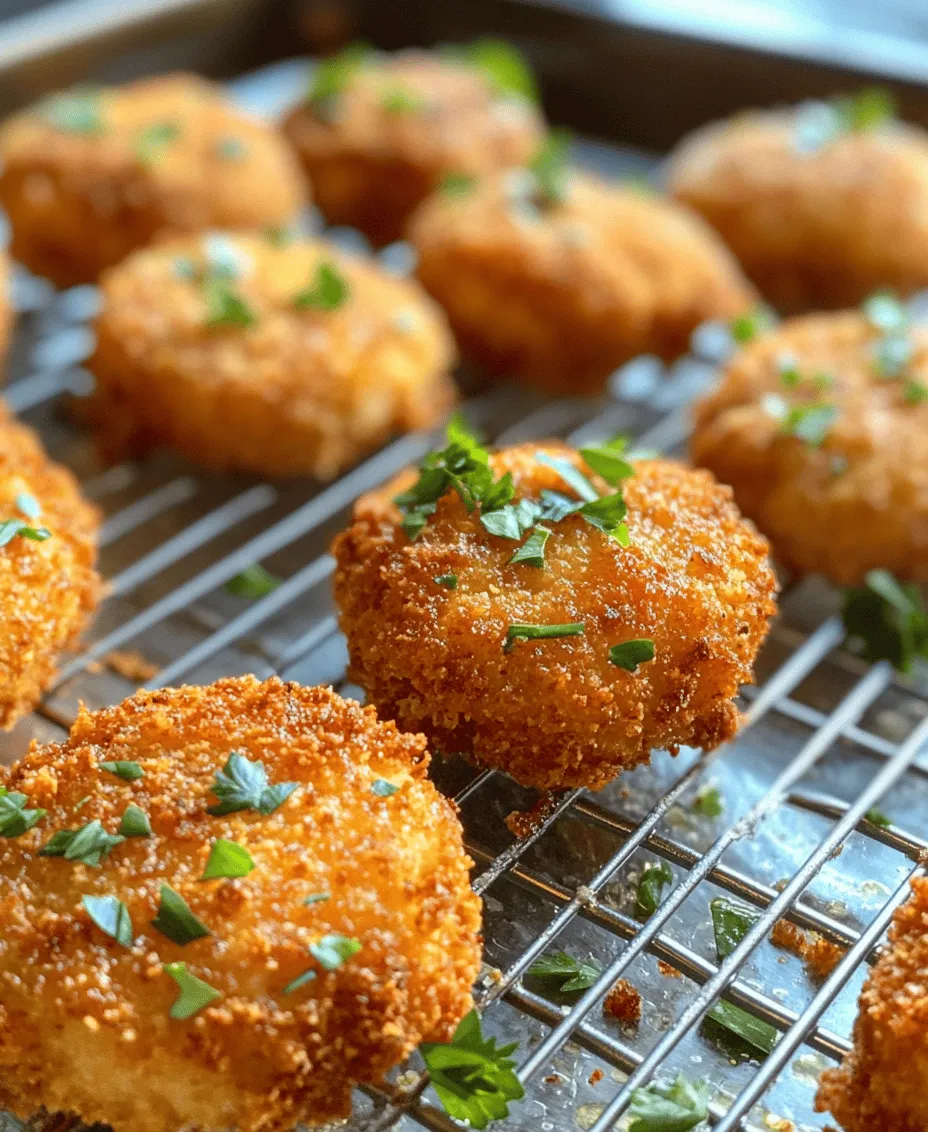
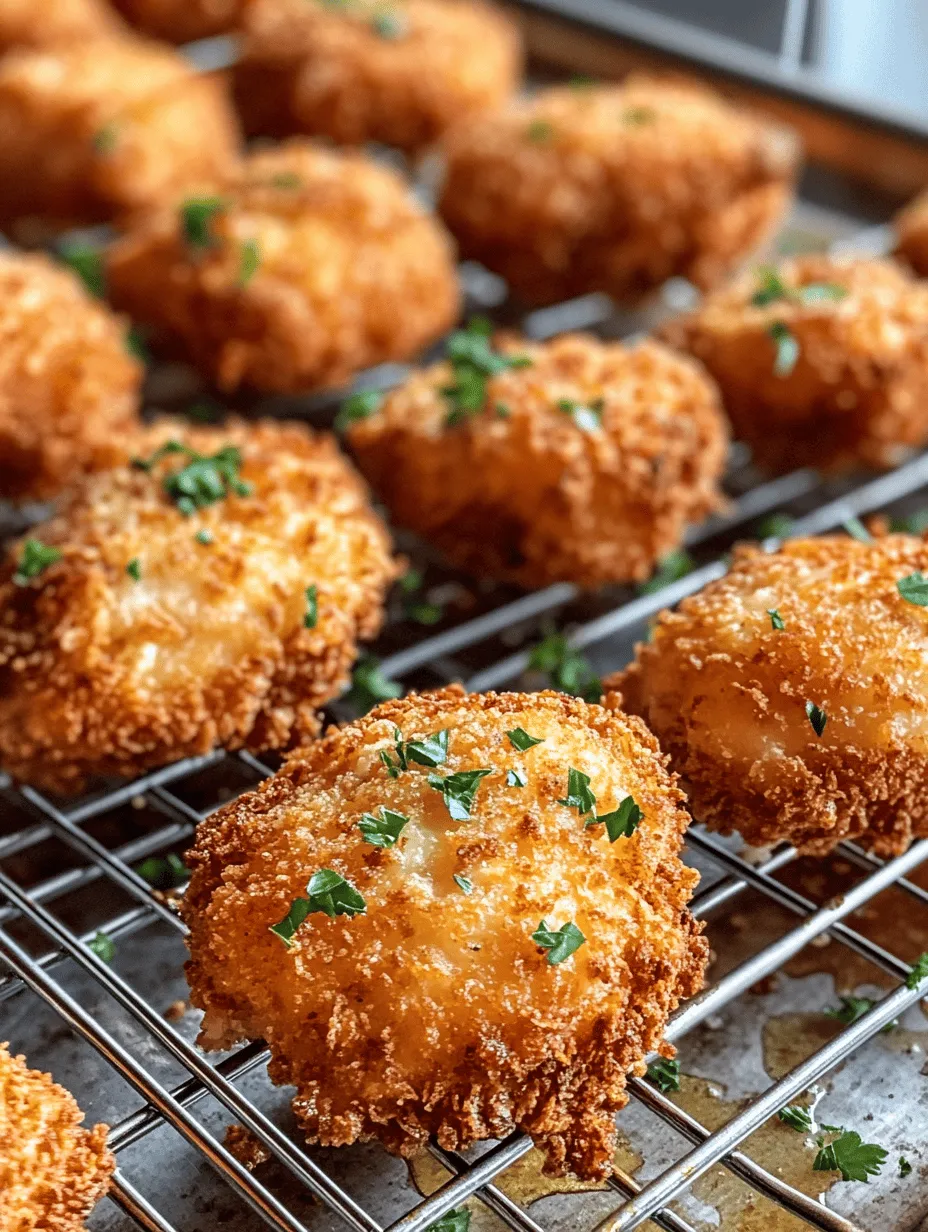
Once the chicken is cooked, carefully remove it from the oil using a slotted spoon or tongs. Allow the excess oil to drip off, and then place the fried chicken on a wire rack set over a baking sheet. This will prevent the chicken from steaming and losing its crispy texture.
Resting the Chicken
Let the chicken rest for about 5-10 minutes before serving. This resting period allows the juices to redistribute, ensuring each bite is moist and flavorful.
Serving Suggestions
Buttermilk fried chicken is a versatile dish that pairs beautifully with a variety of sides. Classic accompaniments include:
– Creamy coleslaw
– Mashed potatoes with gravy
– Cornbread
– Green beans
– Macaroni and cheese
Feel free to mix and match your favorites for a complete meal that will impress your family and friends.
Variations and Customizations
While the classic buttermilk fried chicken recipe is beloved, there are numerous ways to customize it to suit your taste. Here are a few ideas:
– Spice Blends: Experiment with different spice blends, such as Cajun seasoning for a Southern twist or Italian herbs for a unique flavor.
– Alternative Frying Methods: If you’re looking for a healthier option, consider air frying. Coat the chicken as you normally would, then cook in an air fryer at 375°F (190°C) for 25-30 minutes, flipping halfway through.
– Side Dish Ideas: For a twist on traditional sides, try serving the chicken with a refreshing cucumber salad or sweet potato fries.
Encouraging creativity in the kitchen allows you to discover new flavor combinations while still cherishing the essence of this classic dish.
Conclusion
Crispy buttermilk fried chicken is not just a meal; it’s an experience that brings joy to both the cook and those who enjoy it. By following the steps outlined above—from the brining process to the final frying technique—you can create a dish that is both flavorful and satisfying.
The love and care that go into making this dish reflect the joy of cooking and sharing great food with friends and family. So gather your ingredients, roll up your sleeves, and embark on this culinary journey. Your crispy buttermilk fried chicken is sure to be a hit at any gathering, leaving everyone asking for seconds and sharing in the delightful experience of homemade cooking. Enjoy every bite!


