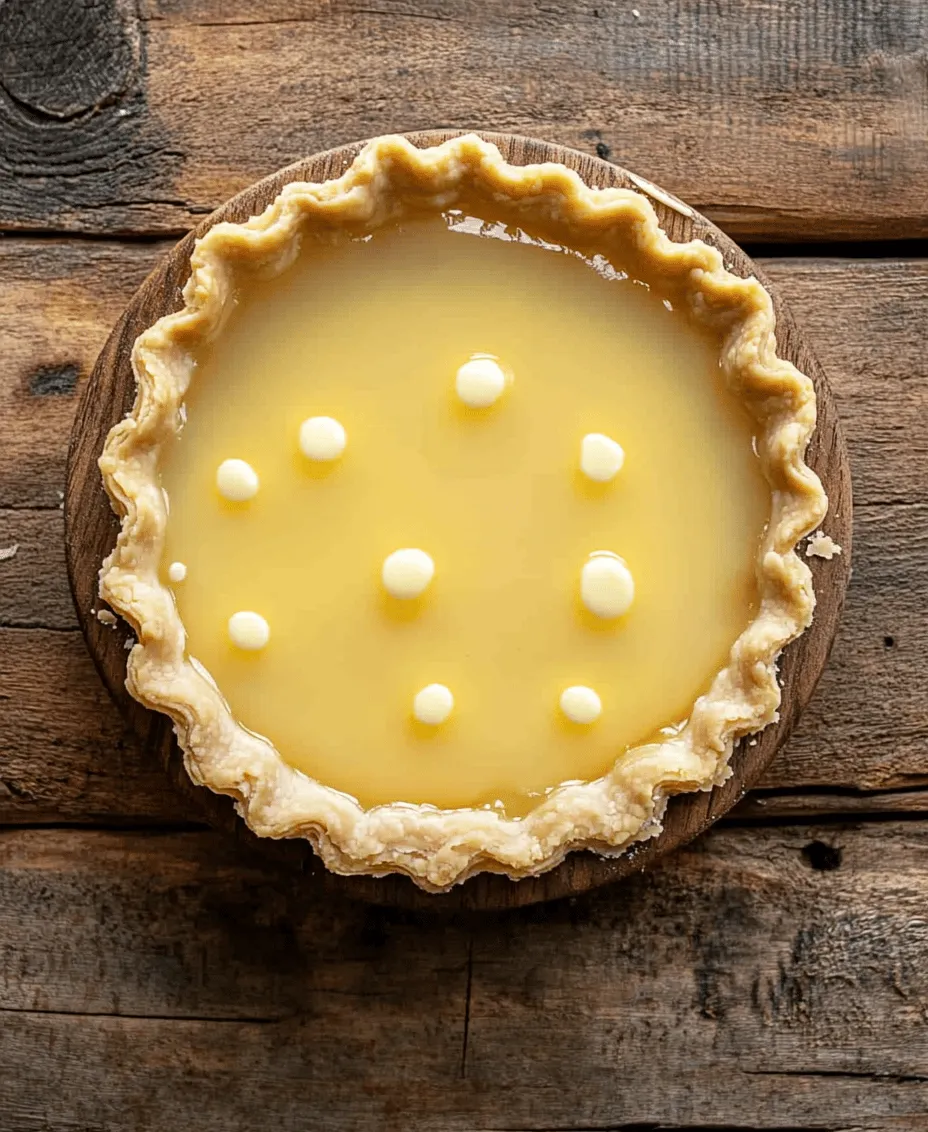
Water Pie is not your typical dessert; its very name evokes curiosity and an air of mystery. This delightful dish has recently garnered attention for its simple yet surprisingly flavorful profile, transforming what might seem like an odd concept into a beloved recipe. Originating from the Great Depression era, Water Pie exemplifies resourcefulness in the kitchen, allowing families to create a comforting dessert experience even in the face of scarcity. In this article, we will delve into the history of Water Pie, explore its key ingredients, and provide a detailed step-by-step guide to its preparation. By the end, you will be equipped to recreate this nostalgic treat in your own home, bringing a piece of culinary history to your table.
The Fascinating History of Water Pie
Understanding the origins of Water Pie offers insight into its significance during difficult times. The Great Depression was a challenging period in American history, marked by widespread unemployment and food shortages. Families faced the daunting task of stretching their limited resources, which often meant getting creative in the kitchen. Water Pie emerged as a product of this necessity, showcasing the ingenuity of home cooks who sought to create satisfying meals and desserts using whatever ingredients they had on hand.
Historical Context
During the Great Depression, many households struggled to put food on the table. The scarcity of ingredients forced families to simplify their recipes, relying on basic pantry staples. Water Pie is a prime example of this trend, as it contains a minimal amount of ingredients, making it accessible to those facing tough economic times. The pie’s humble beginnings reflect the resilience and adaptability of people during this period, symbolizing hope and comfort through food.
Resourcefulness in Cooking
Water Pie is a testament to the resourcefulness of home chefs. With limited access to fresh fruits, eggs, and dairy, families had to innovate, turning to ingredients that were more readily available. This pie, with its uncomplicated assembly and minimal components, allowed cooks to create a dessert that could still bring joy to their families without breaking the bank. The concept of transforming water into a sweet, satisfying pie challenges our modern notions of what should be included in a dessert, proving that creativity knows no bounds.
The Evolution of Water Pie
Initially born out of necessity, Water Pie has since evolved into a unique culinary curiosity. Over the years, this recipe has gained popularity among food enthusiasts, historians, and home bakers alike. Today, it serves not only as a nostalgic nod to the past but also as a reminder of the importance of simplicity in cooking. Water Pie has found its way into cookbooks, blogs, and social media feeds, encouraging a new generation to experiment with this intriguing dish. Its rise to fame is a perfect example of how a recipe can transcend its origins, becoming a beloved part of American culinary culture.
Ingredients Breakdown: What Makes Water Pie Special
A closer look at the ingredients that come together to create this simple yet delicious pie reveals why Water Pie has captivated so many hearts. While the ingredient list may seem unassuming, each component plays a vital role in shaping the final product.
Pre-Made Pie Crust
For many home bakers, convenience is key, and using a pre-made pie crust allows for a quick and easy preparation process. This ingredient saves time and effort, enabling you to focus on crafting the pie filling. When selecting a pre-made crust, aim for a high-quality option to ensure a flaky and flavorful base that complements the filling without overwhelming it.
Water as a Star Ingredient
At the heart of Water Pie is, unsurprisingly, water. This unassuming ingredient plays a critical role in the filling, providing moisture and creating a delicate texture. While it may seem strange to feature water so prominently, its incorporation into the pie showcases the creativity of its origins. When combined with sugar and flour, water transforms into a sweet, custard-like filling that surprises many with its rich flavor.
Granulated Sugar
Granulated sugar adds the necessary sweetness to the pie, balancing the flavors and enhancing the overall taste. It works in harmony with the other ingredients to create a filling that is both delightful and satisfying. The sugar also contributes to the structure of the filling, helping it to set as it bakes.
All-Purpose Flour
All-purpose flour acts as a thickening agent, providing the structure needed to transform the watery mixture into a pie filling. This ingredient absorbs moisture and helps bind the other components together, ensuring a cohesive and enjoyable texture. Using the right amount of flour is crucial; too little may result in a runny filling, while too much can lead to a dry, dense pie.
Vanilla Extract
To elevate the flavor profile of Water Pie, vanilla extract is added for its aromatic notes. This ingredient brings warmth and depth to the pie, enhancing the overall sweetness and making each bite more pleasurable. Using pure vanilla extract is recommended, as it offers a richer flavor than imitation varieties.
Salt
Though it may seem counterintuitive to include salt in a dessert, this critical element is essential for bringing out the sweetness in the pie. A small pinch of salt enhances the overall flavor and ensures a well-rounded taste, preventing the dessert from becoming overly sweet or one-dimensional.
Ground Cinnamon
While ground cinnamon is an optional ingredient, it can add a delightful warmth and complexity to the dish. A sprinkle of this spice can evoke feelings of nostalgia and comfort, making Water Pie even more inviting. For those who enjoy the warm flavor of cinnamon, incorporating it into the filling or sprinkling it on top can elevate the dessert to new heights.
Butter
Finally, a touch of butter adds richness and depth to the filling. Its incorporation helps to create a smooth and creamy texture, enhancing the overall mouthfeel of the pie. Using high-quality butter can make a noticeable difference in the final product, ensuring that every bite is satisfying and flavorful.
Step-by-Step Guide to Making Water Pie
Now that we’ve explored the history and key ingredients of Water Pie, it’s time to dive into the preparation process. This comprehensive guide will detail each step, ensuring that even novice bakers can follow along with ease.
Preheating the Oven
Before beginning any baking project, it’s essential to preheat your oven. This step ensures that your pie bakes evenly and achieves the desired texture. For Water Pie, preheat your oven to 425°F (220°C). This temperature will help create a golden crust while allowing the filling to set properly.
Preparing the Pie Crust
While using a pre-made pie crust simplifies the process, there are a few techniques to ensure it fits well in your pie dish and looks aesthetically pleasing. Begin by removing the crust from its packaging and gently unrolling it. Carefully place the crust into a 9-inch pie dish, pressing it against the bottom and sides without stretching it. Trim any excess crust hanging over the edges, leaving about half an inch to allow for crimping.
Once the crust is in place, you can crimp the edges for a decorative touch. To do this, pinch the crust between your fingers to create a scalloped effect or use the tines of a fork to press down along the edges. This not only enhances the visual appeal but also helps to ensure that the crust holds its shape during baking.
Next, it’s advisable to dock the crust with a fork. This means making small holes in the bottom and sides with a fork, which helps prevent the crust from puffing up while baking. Place the prepared crust in the refrigerator to chill while you prepare the filling. This will help maintain its shape and flakiness during the baking process.
With the oven preheated and the pie crust prepared, you are now ready to move on to the filling, where the magic of Water Pie truly begins. Stay tuned for the next part of this article, where we will dive deeper into the preparation of the Water Pie filling and the final baking process.

Creating the Filling
To prepare the filling for Water Pie, begin by gathering your dry and wet ingredients. This simple, yet satisfying pie relies on a few basic components that come together to create a smooth and creamy consistency.
1. Mix the Dry Ingredients: In a medium mixing bowl, combine 1 cup of granulated sugar, 1/4 cup of all-purpose flour, and a pinch of salt. Whisk these ingredients together until they are well-blended. The flour acts as a thickening agent, helping to give the pie its characteristic texture, while the sugar adds sweetness.
2. Prepare the Wet Ingredients: In another bowl, combine 1 1/2 cups of water and 1 teaspoon of vanilla extract. For a richer flavor profile, consider using vanilla bean paste instead. This not only enhances the vanilla flavor but also adds visual appeal with its tiny flecks throughout the filling.
3. Combining the Ingredients: Slowly pour the wet ingredients into the dry mixture while continuously whisking. This step is crucial as it prevents clumping and ensures a smooth filling. Whisk until the mixture is entirely combined and free of lumps. The resulting mixture should have a light, airy texture that will bake beautifully in the crust.
Pouring and Dotting
Once your filling is prepared, it’s time to fill the prepared pie crust. Here are some key tips to achieve an even filling and ensure the butter is distributed properly:
1. Pouring the Filling: Carefully pour the filling into the pie crust. Start from the center and move outward in a circular motion. This technique helps to minimize bubbles and allows for an even distribution of the filling across the crust.
2. Dotting with Butter: For additional flavor and richness, dot the top of the filling with small pieces of butter. Use about 2 tablespoons of unsalted butter, cut into tiny cubes, and distribute them evenly over the surface of the filling. This step adds a luxurious mouthfeel and enhances the pie’s overall taste.
Baking the Pie
Baking Water Pie is a straightforward process, but there are key indicators to watch for during the baking process to ensure perfect results:
1. Preheat the Oven: Make sure your oven is preheated to 350°F (175°C) before placing the pie inside. This ensures a uniform cooking temperature from the start.
2. Baking Time: Bake the pie for approximately 30-35 minutes. The filling will begin to set around the edges while remaining slightly jiggly in the center. This is perfectly normal, as the pie will continue to firm up as it cools.
3. Visual Cues: Monitor the pie closely as it bakes. Look for a golden brown crust and a slightly puffed filling. If the edges of the crust begin to brown too quickly, cover them with strips of aluminum foil to prevent burning.
Cooling and Serving
After baking, it’s essential to allow the pie to cool properly before serving. Here are some recommendations for serving temperature and presentation:
1. Cooling Time: Allow the pie to cool at room temperature for at least 1 hour before slicing. This resting period helps the filling set completely and makes for cleaner slices.
2. Serving Temperature: Water Pie can be enjoyed warm, at room temperature, or even chilled. Each temperature offers a different experience, so feel free to experiment based on your preference.
3. Presentation: When ready to serve, slice the pie into wedges and transfer them to dessert plates. For an elegant touch, garnish with a dusting of powdered sugar or a sprinkle of cinnamon. Consider serving it alongside fresh berries for a pop of color and added flavor.
Exploring Variations and Customizations
While Water Pie is delightful in its original form, there are plenty of ways to enhance or modify the recipe to suit personal preferences:
1. Flavor Additions: To diversify the flavor, consider incorporating additional ingredients such as lemon zest, almond extract, or even a splash of bourbon for a unique twist. You can also fold in fresh fruits like blueberries, peaches, or cherries before pouring the filling into the crust, providing bursts of flavor and color.
2. Alternative Sweeteners: If you prefer a different sweetness profile, explore options like honey, maple syrup, or agave nectar. Keep in mind that these alternatives may alter the texture slightly, so you may need to adjust the amount used based on your taste.
3. Gluten-Free Adaptations: For those with gluten sensitivities, making a gluten-free version of Water Pie is simple. Substitute the all-purpose flour with a gluten-free flour blend, and ensure your pie crust is also gluten-free. Many stores offer pre-made gluten-free pie crusts, which can save time and effort.
Nutritional Insights: Understanding the Health Aspects
Water Pie, while a delightful treat, also raises questions about its nutritional content and how it fits into a balanced diet.
1. Caloric Breakdown: Each slice of Water Pie contains approximately 180-200 calories, depending on the portion size and specific ingredients used. This calorie count can be adjusted based on the sweetness and crust choices.
2. Sugar Considerations: The primary sweetener in Water Pie is granulated sugar. While sugar enhances flavor, it’s essential to be mindful of its intake. For those looking to reduce sugar consumption, consider using natural sweeteners or decreasing the amount of sugar in the recipe without sacrificing too much sweetness.
3. Dietary Restrictions: Water Pie is generally suitable for vegetarians. For those with specific dietary needs, such as lactose intolerance, using a dairy-free butter option can make the pie more accessible. Always check ingredient labels to ensure compatibility with dietary restrictions.
Serving Suggestions: Making Water Pie a Memorable Experience
To elevate the experience of enjoying Water Pie, consider these serving suggestions:
1. Pairing with Whipped Cream: A dollop of freshly whipped cream can complement the pie beautifully. The creaminess of the whipped topping balances the pie’s lightness, creating a delightful contrast. For added flavor, consider infusing the whipped cream with a hint of vanilla or a splash of your favorite liqueur.
2. Accompanying Beverages: Pair Water Pie with beverages that enhance its flavor, such as a light dessert wine, a cup of coffee, or a refreshing iced tea. The beverage choice can significantly affect the overall dessert experience, so choose something that pleases your palate.
3. Presentation Tips: Get creative with your presentation! Serve slices of Water Pie on colorful plates, add a sprig of mint for a fresh touch, or use decorative forks to make the serving more inviting. A well-presented dessert not only tastes better but also becomes a centerpiece at gatherings.
Conclusion: The Timeless Appeal of Water Pie
Water Pie stands as a testament to the creativity and resilience of home cooks throughout history. Its simplicity and unique flavor make it a charming addition to any dessert table. By mastering the recipe, exploring variations, and considering serving options, you can enjoy this delightful pie and share its story with others.
Whether you are revisiting a childhood favorite or trying it for the first time, Water Pie is sure to leave a lasting impression. Its versatility allows it to be a canvas for your culinary creativity, making it not just a dessert but an experience. So, gather your ingredients, invite friends and family to join in the baking process, and create your own memorable moments with Water Pie.


